On Page SEO: The Complete Tutorial for Bloggers and Website Owners
Imagine pouring hours into writing the perfect blog post, only to have it disappear into the black hole of page five on Google. Frustrating, right? The good news is that there is a skill you can learn to help your content actually get found, and it is called on page SEO.
On page SEO is the practice of optimizing the content and elements directly on your website to rank higher in search engines. Think of it as giving Google a clear roadmap to understand what your page is all about. The best part? You do not need to be a tech wizard or hire an expensive agency to do it well.
In this tutorial, we are going to break everything down in plain, simple language. You will learn what on page SEO actually means, why it matters for your blog or website, and the exact steps you can take today to start seeing real results. Whether you just launched your first blog or you have had a website sitting around for years, this guide is built specifically for you. Let’s dig in!
What Is On Page SEO and Why Does It Still Matter in 2026
On-page SEO is the practice of optimising individual web pages so they rank higher in search engine results. Think of it as everything you do directly on a page to help both Google and your readers understand what it’s about. That includes your title tags, headings, the quality of your written content, how you use keywords, your internal links, URL structure, and even your images. According to Google’s own SEO Starter Guide, the goal is straightforward: help search engines and users understand your page’s content. Simple in theory, but there’s a lot of ground to cover.
It helps to know where on-page SEO sits alongside the other two pillars of SEO. Technical SEO deals with your site’s infrastructure, things like site speed, crawlability, and mobile performance. Off-page SEO is about external signals, primarily backlinks and your overall authority on the web. On-page SEO sits in the middle and is everything you control on the page itself. A useful way to think about it: technical SEO builds the road, on-page SEO signposts the destination, and off-page SEO is the word-of-mouth that sends people there.
Here is the really encouraging part for beginners. Despite major algorithm updates, AI disruption, and the rise of generative search, the core on-page fundamentals have barely changed since 2019. Keyword usage, well-structured content, descriptive title tags, and internal linking still drive rankings today just as they did years ago.
Recommended Reading
Perhaps the most compelling proof comes from AI search. Research shows that 97% of AI Overview citations come from pages already ranking in the top 20 organic results. In other words, strong traditional on-page quality is still your gateway to visibility, even in an AI-driven search landscape.
This tutorial is written specifically for bloggers, WordPress site owners, and anyone monetising content through AdSense or affiliate links. If you control your own pages but feel unsure where to start with SEO, this guide is your starting point.
Your On Page SEO Checklist: Step by Step
Think of this checklist as your go-to routine, something you run through every single time you publish a new blog post or page. It is not a one-time fix you apply and forget. Just like a pilot runs through pre-flight checks before every journey, you should work through these steps before (and after) hitting publish. Building this habit is what separates sites that consistently rank from those that plateau.
The checklist covers eight core elements: keyword research and search intent, title tags and H1, meta descriptions, URL structure, content quality and header tags, internal and external linking, image optimisation, and technical signals like Core Web Vitals and schema. You can explore a solid breakdown of these in this on-page SEO checklist for 2026.
Here is the part most beginners miss: these elements do not work in isolation. Each one builds on the last. A brilliant title tag cannot save a page with weak content. Strong content loses impact without clean internal linking. Skipping even one element leaves ranking potential on the table, and in a competitive search landscape, those small gaps add up fast.
Step 1: Title Tag Optimisation
Your title tag is one of the most powerful on-page SEO elements you have, and it does two very important jobs at the same time. First, it tells Google exactly what your page is about so it can match your content to the right search queries. Second, and just as importantly, it has to convince a real human being scrolling through a page of results to choose your link over everyone else’s. Think of it as your shop window. It needs to be clear, relevant, and genuinely appealing.
Getting the basics right: keyword placement and character limits
The golden rule is to place your primary keyword as close to the beginning of your title tag as possible. Google reads left to right, just like we do, and front-loading your keyword signals relevance quickly. Keep your title between 50 and 60 characters in total. Go longer than that and Google will cut it off mid-sentence in the search results, which looks messy and can hurt your click-through rate. According to Ohio State University’s content optimisation guidance, including your primary keyword in the title tag directly increases your likelihood of ranking higher.
Writing for clicks, not just crawlers
Here is where a lot of beginners go wrong. They stuff as many keywords as possible into the title and call it done. A title like “SEO Tips Small Business Website Optimisation Ranking” technically contains keywords, but it reads like a robot wrote it, because it kind of did. Nobody is going to get excited and click that.
The Seeklab 2026 guide to title tags and meta descriptions frames title tags as “query contracts,” meaning your title should make an explicit promise to the reader about what they will find when they click. That is a brilliant way to think about it. Your title is not just a keyword container; it is a commitment.
The 2026 trend: first-person, personalised titles
One of the most interesting shifts noted by SEO researchers heading into 2026 is the rise of personalised, first-person title tags. Using pronouns like “I,” “my,” and “you” creates an immediate human connection in a crowded search results page. It feels less like a corporate listing and more like a genuine recommendation from someone who has actually done the thing.
This is an emerging tactic rather than a statistically proven formula, but it is gaining real traction among content creators and bloggers who are tracking their click-through rates closely.
Before and after examples
Here is what this looks like in practice:
- Food blogger: “Easy Pasta Recipes Dinner Quick” becomes “5 Easy Pasta Recipes I Make Every Week”
- Small business owner: “SEO Tips Small Business Website Optimisation” becomes “SEO Tips That Helped My Small Business Rank #1”
- Finance blogger: “Budget Planning Guide Save Money” becomes “How I Saved £5,000 This Year: My Budget Plan”
Each improved version keeps the keyword near the front, stays within 60 characters, and uses natural language that feels written for a person rather than a search engine. That combination is exactly what strong title tag optimisation looks like in 2026.
Step 2: Writing Meta Descriptions That Get Clicks
Here is something that surprises a lot of beginners: meta descriptions do not directly affect where you rank. Google has confirmed this many times. However, they have a huge indirect impact because they influence your click-through rate (CTR), which is how often people actually click your link in the search results. When more people click your result, Google takes that as a signal that your page is relevant and useful, which can nudge your rankings upward over time. So while meta descriptions are not a ranking lever, they are absolutely a traffic lever, and that matters.
Keep your meta description between 120 and 155 characters. Mobile devices truncate descriptions at around 120 characters, so front-load your most important information. Always include your focus keyword naturally, because Google bolds matching search terms in the snippet. That visual highlight draws the eye and signals to the searcher that your page is exactly what they were looking for.
A strong meta description does three things: it highlights a clear benefit, creates a little curiosity or urgency, and ends with a soft call to action. Compare these two examples for a blog post about productivity tips:
Weak: “This post is about productivity tips for remote workers. Read our article to find out more.”
Strong: “Struggling to stay focused at home? Discover 10 proven remote work productivity tips that help you reclaim your day. Start today.”
The second version hooks the reader with a pain point, includes the keyword naturally, and tells them what to do next.
Please do not leave your meta description blank. Google will auto-generate one, pulling random sentences from your page, and it rarely reflects your best pitch to a potential visitor. Google rewrites meta descriptions at a rate of 63 to 71% even when you provide one, so writing a compelling description gives you the strongest possible candidate for that snippet. For practical tips on crafting them well, this guide on writing the perfect SEO meta description is a great starting point, and you can also explore SEO metadata best practices for boosting CTR for more detail.
Step 3: H1 and Heading Structure
Every page on your website should have exactly one H1 tag, and it should contain your primary keyword. Think of your H1 as the main headline of your page. It tells Google immediately what the page is about, and it reassures your reader that they have landed in the right place. Having more than one H1 confuses search engines about which topic is most important, so keep it to just one, clear, keyword-rich headline per page.
Below your H1, your H2 and H3 headings do the heavy lifting of organising your content. H2s act as your main section titles, breaking the page into digestible chunks. H3s then sit underneath each H2 to add further detail and depth. This logical hierarchy helps Google understand not just your topic, but how thoroughly you have covered it. According to Yoast’s guide on using headings, search engines and AI systems actively use heading structure to interpret the topic and layout of your content.
Well-structured headings also keep readers on your page longer. When someone lands on your post, they scan the headings first. Clear, descriptive headings make it easy to navigate, which reduces bounce rate and increases dwell time, both of which are widely considered indirect ranking signals.
Your H2 headings are also a great place to naturally weave in secondary keywords and related phrases. For example, if your H1 targets “on page SEO,” an H2 might read “How to Optimise Your Content for Search Engines.” You are capturing extra search variations without stuffing keywords awkwardly into your text.
Here is a simple example structure for a blog post targeting “best running shoes for beginners”:
- H1: Best Running Shoes for Beginners (2026 Guide)
- H2: What to Look for in a Beginner Running Shoe
- H3: Cushioning and Support
- H3: Fit and Sizing Tips
- H2: Top 5 Running Shoes for New Runners
- H2: Frequently Asked Questions
For a deeper look at heading best practices, the H1-H6 headings guide at Seobility covers the full hierarchy in plain, accessible language.
Step 4: Keyword Placement Without Stuffing
Now that your title tag, meta description, and heading structure are all in good shape, it is time to talk about one of the most misunderstood areas of on-page SEO: how to actually use your keyword throughout your content.
There is a big difference between natural keyword placement and keyword stuffing. Natural placement means weaving your focus keyword into your content in a way that feels completely normal to a human reader. Keyword stuffing is the opposite: forcing the same phrase into every other sentence until it reads like a robot wrote it. For example, imagine a post that repeatedly says “best on-page SEO tips, on-page SEO guide, on-page SEO checklist” in every paragraph. That is keyword stuffing, and following Google’s March 2024 Core Update, it can now trigger a spam penalty. That update removed 45% of low-quality, algorithm-targeted content from search results, sending a very clear message: write for people, not for bots.
So where should your keyword appear? Aim to include it in your title tag, your H1, within the first 100 words of your post, in at least one H2 subheading, and in your meta description. You have already covered the first three steps in this checklist, so this should feel like a natural extension of what you are already doing.
Beyond your exact focus keyword, Google also looks at the wider vocabulary of your page. This is the principle behind LSI, or Latent Semantic Indexing. Rather than counting how many times you typed one specific phrase, Google analyses related terms and synonyms to understand your topic fully. If your post is about on-page SEO, naturally including terms like “title tags,” “search intent,” “meta descriptions,” and “content optimisation” all helps Google build a richer picture of your page.
As a rough guide, aim for a keyword density of around 1 to 2%, meaning your focus keyword appears roughly once or twice per 100 words. If you use WordPress with a plugin like Yoast SEO or Squirrly, these tools give you instant feedback on density without any complicated maths. The practical advice from SEO professionals is consistent: write naturally first, then do a quick audit afterwards rather than counting keywords as you type.
Step 5: URL Slug Optimisation
Your URL slug is the readable part of a web address that comes after your domain name. For example, in www.yoursite.com/blog/on-page-seo-tips, the slug is on-page-seo-tips. It sounds small, but getting this right is one of the simplest and most effective on-page SEO wins available to any website owner, requiring zero technical skills and no budget whatsoever.
Here are the key best practices to follow every time you create a new page or post:
- Keep it short and descriptive. Aim for around 3 to 5 words that summarise the page topic clearly.
- Use hyphens, not underscores. Google reads hyphens as word separators, so
on-page-seo-tipsis understood as four separate words. Underscores can cause issues with how search engines read your URL. - Include your primary keyword. Place it as close to the beginning of the slug as possible to reinforce your page’s topical relevance.
- Remove stop words. Words like “and,” “the,” “a,” and “of” add unnecessary length without adding SEO value. Cut them out.
Here is a quick comparison to make this crystal clear:
| Example | |
|---|---|
| Poor slug | /blog/the-best-tips-and-tricks-for-on-page-seo-in-your-website |
| Optimised slug | /blog/on-page-seo-tips |
One very important warning: never change an existing slug on a live, ranking page without setting up a 301 redirect first. Without it, your old URL returns a 404 error, your backlinks lose their value, and your rankings can drop significantly overnight. According to Semrush’s on-page SEO guide, URL structure is a core on-page signal, so treat existing slugs with real care. The golden rule is simple: optimise slugs before you publish, and leave established, ranking URLs alone unless you have redirects properly in place.
Step 6: Internal Linking
Internal linking is one of those on-page SEO tasks that beginners often overlook, but Google’s own John Mueller has called it “super critical for SEO and one of the biggest things you can do on a website.” So let’s break down exactly why it matters and how to do it well.
When you link from one page to another within your own site, you are doing two powerful things simultaneously. First, you are helping Google’s crawler discover and index your content faster. Without internal links pointing to a page, it can become an “orphan page” that Google simply never finds. Second, you are distributing link equity (sometimes called PageRank) from stronger pages to pages that need a ranking boost. Think of it as sharing authority around your site rather than letting it pool in one place.
Anchor text matters more than you might think. The clickable words you use in a link tell Google what the destination page is about. Instead of writing “click here” or “read more,” use descriptive, keyword-relevant phrases like “beginner’s guide to on-page SEO” or “how to write meta descriptions.” That context genuinely helps rankings.
Make a habit of linking to at least two or three relevant existing posts every time you publish something new. It takes just a few minutes and pays dividends for both your new and older content.
For a more strategic approach, consider building pillar pages and content clusters. A pillar page covers a broad topic comprehensively, while shorter cluster posts tackle specific subtopics. Each cluster post links back to the pillar, and the pillar links out to all clusters. This interconnected structure signals deep topical authority to Google, which is increasingly important in 2026. You can learn more about building this kind of architecture in this Internal Linking Strategy 2026 guide.
Beyond SEO, internal links genuinely improve the experience for your readers by guiding them toward related content they will actually want to read, which keeps them on your site longer and reduces your bounce rate.
Step 7: Image Alt Text and File Names
Alt text is the written description you attach to an image in your content. Google cannot actually “see” images the way you can, so alt text acts as a translator, telling search engines exactly what the image shows. It also serves as an accessibility feature for screen reader users who are visually impaired. When a screen reader reaches an image on a page, it reads the alt text aloud so the user understands what is there. It is both an SEO tool and a kindness to your audience.
Best practices to follow:
- Describe the image accurately. Focus on what the image actually shows, including context, not just the main subject.
- Include your focus keyword where it fits naturally. Do not force it in, but if it makes sense, use it. Keyword stuffing in alt text is counterproductive.
- Keep it concise. Aim for under 125 characters so screen readers and search engines can process it cleanly.
Here is the difference between a generic and an optimised alt text in practice:
- Generic (poor):
alt="image1" - Optimised:
alt="on-page SEO checklist printed on paper with pen"
See how the second version is descriptive and includes the focus keyword naturally? That is exactly what you are aiming for.
Image file names matter too. Before uploading anything to your site, rename the file. Use on-page-seo-checklist.jpg rather than IMG_4892.jpg. Search engines read file names as an extra relevance signal, so make them count. Use lowercase letters and hyphens between words.
Finally, compress your images before uploading. Large image files slow your page down, which affects your Core Web Vitals score. We will cover Core Web Vitals in more detail later in this tutorial, but compressing images is one of the quickest wins you can make right now.
Step 8: Content Quality and Depth
Content quality is now the single most important on-page SEO factor Google considers, and this shift has been building for years. It is no longer enough to hit a certain keyword density or pad your post to reach a specific word count. Google’s algorithm has become sophisticated enough to evaluate whether your content genuinely helps someone, and it rewards pages that do exactly that.
So what does “quality” actually mean in practical terms? It comes down to four things: answering the searcher’s question fully, bringing original insights or first-hand experience to the topic, structuring your information so it is easy to follow, and covering the subject with enough depth that readers do not need to click away to find more. A quality post does not just skim the surface; it satisfies the reader completely.
Google’s March 2024 Core Update made this crystal clear. It reduced low-quality content appearing in search results by 45% and introduced new spam policies specifically targeting AI-generated content that lacks genuine human oversight. If you are using AI tools to help write, that is fine, but the content still needs your expertise, your voice, and your editorial judgement behind it.
On the topic of length, longer content is only better when every paragraph earns its place. Padding posts with filler sentences just to hit a word count actively hurts your rankings because it dilutes the value of your page and frustrates readers.
Finally, always consider search intent alignment before you write. If someone searches “best laptops under £500,” they want a comparison list, not a 2,000-word essay on laptop history. Match your content format, whether that is a tutorial, a list, or a how-to guide, to what searchers actually expect when they type that query.
E-E-A-T: The Number One On Page Ranking Signal in 2026
If you have been following this guide step by step, you have already covered a lot of ground. But there is one on-page signal that ties everything together, and in 2026 it is more important than ever. That signal is E-E-A-T.
E-E-A-T stands for Experience, Expertise, Authoritativeness, and Trustworthiness. Google originally used just three of these pillars under the name E-A-T, but in December 2022 it added “Experience” as the first letter. The reason is straightforward: as AI-generated content flooded the web, Google needed a way to distinguish content written by real people with genuine, first-hand knowledge from generic summaries that any tool could produce. AI can summarise a topic, but it cannot honestly say “I tested this on my own site and here is what happened.” That lived experience is something only a real person can bring to the table, and Google increasingly rewards it.
Research suggests that sites with strong E-E-A-T signals have a 30% higher chance of ranking in the top 3 positions, which makes building these signals one of the highest-return activities you can focus on as a blogger.
What E-E-A-T Looks Like on the Page
For solo bloggers, the good news is that E-E-A-T does not require a massive brand or hundreds of backlinks. You can demonstrate it right on the page itself. A detailed author bio that lists your credentials, relevant background, and areas of expertise signals both Trustworthiness and Expertise to Google’s quality raters. Linking out to authoritative, primary sources throughout your post shows that your content is well-researched rather than made up on the spot. Including original photos, screenshots, or personal anecdotes adds the Experience layer that generic content simply cannot replicate.
The Experience pillar is where most bloggers have a genuine competitive edge if they choose to use it. Writing something like “I installed this plugin on my own WordPress site and noticed the load time dropped by two seconds” is exactly the kind of documented, first-hand result that Google is now trained to value. Case studies, personal test results, and honest before-and-after accounts all feed directly into this signal.
Your Quick E-E-A-T Checklist
Here are five improvements you can make today:
- Add or update your author bio box with your real credentials and relevant experience
- Link out to authoritative sources within your content to reinforce Trustworthiness
- Add a “last updated” date to your posts so readers and Google can see the content is current
- Include original images or screenshots that document your real-world experience with the topic
- Add a short personal case study or documented result somewhere in the post
None of these require a budget or technical expertise. They just require honesty, transparency, and the willingness to share what you have genuinely experienced.
On Page SEO in WordPress: Using Yoast and Squirrly
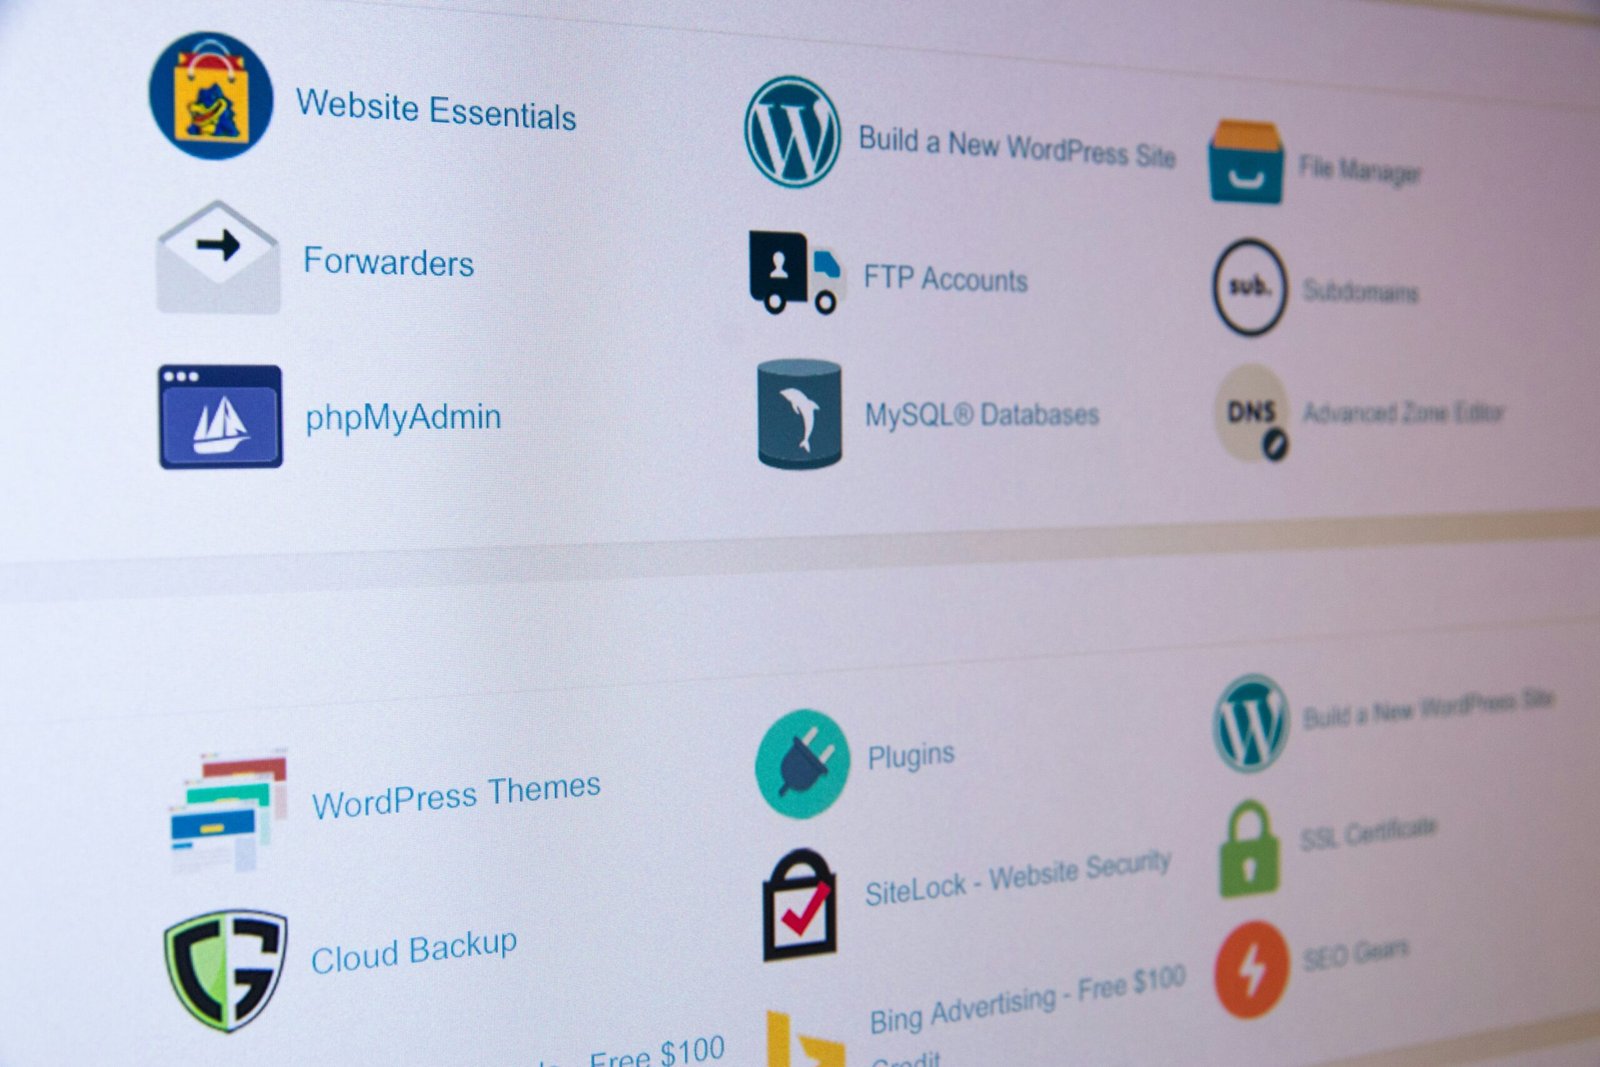
If you are running your website on WordPress, you are in good company. WordPress powers a huge proportion of the web, and it remains the go-to platform for bloggers, small businesses, and content creators who want flexibility without needing a computer science degree. The only challenge is that raw WordPress does not come with built-in SEO controls. Without a plugin, adjusting your meta title, writing a meta description, or setting up schema markup requires digging into code, which is the last thing most bloggers want to do. That is exactly where dedicated SEO plugins come in. They transform all of those technical tasks into a simple, guided workflow sitting right inside your post editor, so you can handle your on-page SEO at the moment you are writing, not as a separate technical project afterwards.
Yoast SEO is the most widely recognised option, trusted by over 13 million websites and in active development since 2008. Once installed, it adds a panel to every post and page where you enter your focus keyphrase, which is the main keyword you want that content to rank for. From that single input, Yoast analyses your content in real time and gives you feedback across two tabs: SEO and Readability. The SEO tab checks whether your keyphrase appears in your title tag, meta description, introduction, subheadings, and image alt text. The Readability tab looks at sentence length, paragraph structure, transition words, and passive voice. Both tabs use a traffic light system, with red meaning action needed, amber meaning room for improvement, and green meaning you are good to go. The goal before you hit publish is to turn as many indicators green as possible. You also get a live SERP preview showing exactly how your listing will appear in Google results on both desktop and mobile.
Squirrly SEO takes a different approach that many beginners find even more helpful. Rather than analysing your content after you have written it, Squirrly sits alongside you as you type and provides real-time guidance in the moment. It also includes a built-in keyword research tool, which means you can research, plan, and optimise without ever leaving WordPress. If you are the kind of writer who prefers more hand-holding throughout the process rather than a checklist to work through at the end, Squirrly is genuinely worth exploring. Both plugins handle the core on-page tasks, but Yoast suits writers who prefer to write first and optimise after, while Squirrly suits those who want live coaching throughout.
Here is a quick walkthrough using Yoast to optimise a single post before publishing:
- Draft your post in the WordPress editor as normal
- Open the Yoast panel below the editor or in the sidebar
- Enter your focus keyphrase and watch the analysis populate instantly
- Edit your SEO title using the snippet editor, placing the keyphrase near the front
- Write your meta description, including the keyphrase naturally and keeping it within the green character limit indicator
- Work through the red and amber items on the SEO tab, checking keyphrase placement in your intro, headings, and image alt text
- Switch to the Readability tab and address any flagged issues such as overly long sentences
- Check the SERP preview one final time before publishing
For deeper guidance on both plugins, brianhillier.co.uk has dedicated guides covering Yoast and Squirrly in detail, giving you step-by-step walkthroughs tailored specifically for bloggers and website owners who want to get the most out of their WordPress SEO setup.
Core Web Vitals: The On Page and Technical Crossover
Core Web Vitals sit right at the boundary between on-page SEO and technical SEO, which is exactly why they deserve their own spotlight in this guide. In plain English, Core Web Vitals are three specific metrics Google uses to measure how well your page performs from a real user’s perspective.
LCP (Largest Contentful Paint) measures loading speed, specifically how quickly the biggest visible element on your page loads. Google considers anything under 2.5 seconds to be “Good.” INP (Interaction to Next Paint) measures interactivity, meaning how fast your page responds when someone clicks, taps, or types something. A Good score is under 200 milliseconds. CLS (Cumulative Layout Shift) measures visual stability, which is essentially whether your page jumps around while it loads. Anyone who has ever tried to click a button only to have an ad load and push everything down will understand exactly why this matters.
Here is the competitive opportunity hiding in plain sight. Only around 47 to 54% of websites currently pass all three Core Web Vitals thresholds. That means roughly half the websites competing for the same keywords as you are already falling short on a confirmed Google ranking signal. If your blog passes all three, you are already ahead of a significant chunk of your competition without doing anything else.
This also matters for your revenue. Sites that improve their Core Web Vitals from Poor to Good have reported a 25% increase in conversion rates. For a monetised blog running display ads or affiliate links, that kind of uplift is not just an SEO win, it directly affects your income.
For WordPress site owners specifically, the most common culprits are uncompressed images, slow or shared hosting, heavy page builders like Elementor or Divi, and render-blocking scripts from ad networks or social embeds.
The good news is that you do not need a developer to start fixing things. Compress your images before uploading them, install a caching plugin, switch to a lightweight theme, and use your caching plugin’s settings to defer non-critical JavaScript. Small changes here can produce noticeable score improvements fairly quickly.
On Page SEO and AI Overviews: What Has Changed
If you have been keeping up with SEO news lately, you have probably heard a lot of chatter about AI Overviews. But what actually are they, and why does every SEO guide in 2026 seem to treat them as a big deal?
AI Overviews are the AI-generated summaries that appear at the very top of Google search results, sitting above all the traditional blue links. Powered by Google’s Gemini model, they pull information from multiple sources and present a direct answer right on the page. The result is that many users now get what they came for without ever clicking through to a website. Studies suggest AI Overviews now appear on roughly 25% of searches, though estimates range from around 13% to over 34% depending on the methodology used. Either way, that is a significant chunk of search results that now look and behave very differently to what we were used to.
The Click-Through Rate Reality
Here is where it gets important for you as a blogger or website owner. When an AI Overview appears on a search results page, organic click-through rates drop by around 61% for those queries. That means fewer people clicking through to any website below the AI summary. On top of that, there is an average 34.5% reduction in organic clicks on top results overall when AI Overviews are present. If your content targets informational searches, how-to guides, or definition-style topics, this is the area most affected.
The good news? Being cited inside an AI Overview can actually earn your page around 35% more clicks than uncited pages on the same results page. That completely changes the strategy.
Your Best Defence Is Good SEO
Here is the insight that should reassure you: 97% of AI Overview citations come from pages already ranking in the top 20 organic results. In other words, Google’s AI is not finding random pages from across the web. It is pulling from content that strong, traditional on-page SEO has already pushed up the rankings. Your best protection against AI Overview traffic loss is simply doing the same on-page work this guide has already walked you through.
The structure of your content also matters for citation likelihood specifically. Clear headings that reflect the query language, concise definitions placed early in the content, well-organised lists, and direct answers to the main question all increase the chance that Google’s AI selects your page as a source.
Welcome to GEO
This brings us to an emerging term worth knowing: Generative Engine Optimisation, or GEO. GEO is the practice of optimising your content so that AI-powered tools like ChatGPT and Perplexity surface it in their responses, alongside traditional Google rankings. The exciting part is that the on-page signals that help you rank on Google are the same signals that help AI tools pick your content. Clear structure, topical authority, and direct answers all tick both boxes at once.
The mindset shift for bloggers is actually quite simple. Write to fully answer a question in the clearest way possible, and you are simultaneously optimising for Google rankings and AI Overview citations. One well-structured, genuinely helpful piece of content works across all of these surfaces at once.
Free Tools to Audit Your On Page SEO
Think of on-page SEO as a living system rather than a checkbox you tick once and forget. Bloggers who gradually climb the rankings over time are not doing anything magical. They are simply revisiting their content regularly, spotting what needs fixing, and making small improvements that compound over months. The bloggers who plateau are usually the ones who published great content, optimised it once, and then moved on. Building a habit of auditing your on-page SEO, even just once a quarter, puts you firmly in the first group.
If you are looking for a no-cost starting point, the free SEO tools available at brianhillier.co.uk are worth bookmarking. They are designed with bloggers and small website owners in mind, so you can check your key on-page elements without committing to an expensive monthly software subscription. If you are just getting started or working with a tight budget, free tools give you more than enough to make meaningful improvements.
What Your Audit Should Actually Check
A solid free on-page audit covers more than just keywords. You want to look at your title tag length and whether your target keyword appears naturally within it. Check your meta descriptions for quality, length, and whether they are actually compelling enough to earn a click. Review your heading structure to make sure each page has a clear H1 and logical H2 and H3 hierarchy underneath it. Identify any broken internal links that might be sending visitors or Google to dead ends. Look for images missing alt text, since these are easy wins that beginners often overlook. Finally, run a page speed check, because slow-loading pages frustrate users and hurt rankings.
Using Google Search Console
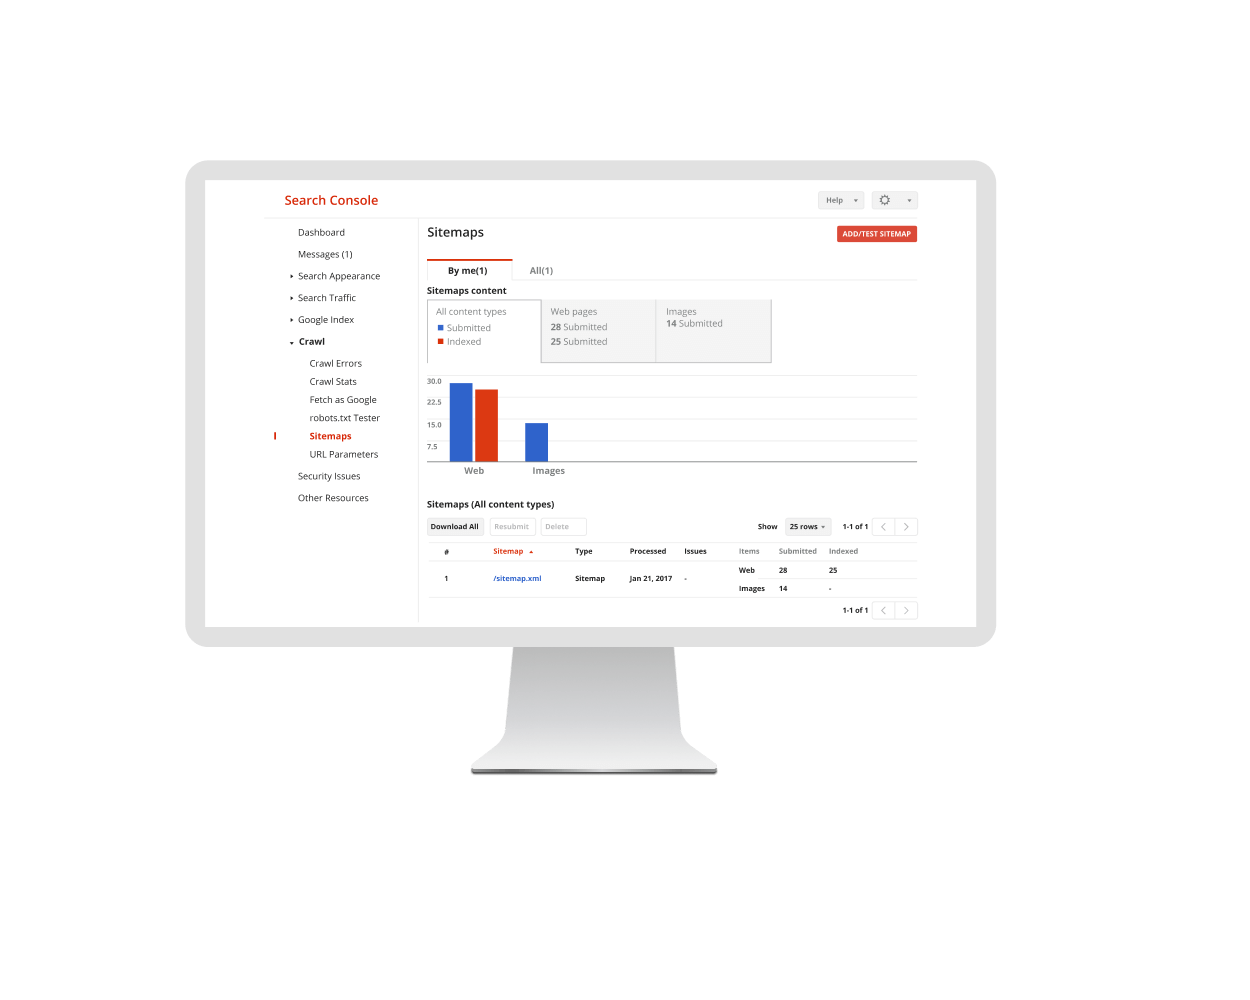
Google Search Console is completely free and genuinely essential. Head to the Performance report and look for pages with high impressions but low click-through rates. This pattern is a reliable signal that your title tag or meta description is not compelling enough to earn the click, even when Google is already showing your page. Rewriting those elements should be one of your first priorities.
Building a Simple Repeatable Workflow
Pick your top 10 performing posts and run an audit on them every quarter. Start with the lowest-effort fixes first, such as updating a weak meta description or adding a missing alt text. After making changes, note your ranking positions and check back in four to six weeks to see whether things have shifted. Tracking your results, even in a simple spreadsheet, turns auditing from a chore into a genuinely motivating habit.
On Page SEO for Monetised Blogs: AdSense and Affiliate Sites
If you are running a blog to earn money, whether through Google AdSense or affiliate partnerships, on-page SEO is not just an optional extra. It is directly wired to your income. Better-ranked pages attract more organic traffic, and more organic traffic means more ad impressions, more affiliate link clicks, and ultimately more revenue. Every time you move a page from position 8 to position 3 in Google, you can receive several times more clicks, and each additional visitor represents another potential ad impression or affiliate conversion at zero extra cost.
Content quality and E-E-A-T also play a surprisingly direct role in your ad earnings. Thin, low-trust content does not just hurt your rankings; it can also signal low quality to ad networks, which suppresses the value of ads shown on your pages. Weak on-page content can therefore create a double penalty, reducing both your search visibility and your revenue per thousand impressions at the same time. Demonstrating genuine expertise through detailed content, clear author information, and real-world experience protects your rankings and supports stronger ad performance simultaneously.
For affiliate content specifically, on-page structure has a direct impact on how many readers actually click through to a merchant. Well-organised comparison posts, strategically placed calls to action, and keyword-intent-matched content all reduce friction in the reader journey. When your page answers exactly what the searcher was looking for and presents a clear next step, click-through rates improve naturally.
Core Web Vitals are especially high-stakes for monetised blogs. Faster pages reduce bounce rates and keep readers on-page long enough to see ads and click affiliate links. Sites that improve Core Web Vitals from poor to good have reported conversion rate increases of around 25%, which is a very real revenue uplift available to any blogger willing to audit and fix their pages.
Treat every monetised post as a business asset worth revisiting regularly. Publish it, yes, but also schedule periodic reviews using Google Search Console and PageSpeed Insights to catch any performance drops before they quietly erode your earnings.
Start Optimising: Your Next Steps
You have covered a lot of ground in this tutorial, so here is a quick recap of everything to carry forward. Optimise your title tags and meta descriptions, structure your headings clearly with a single H1, place keywords naturally throughout your content, build internal links with descriptive anchor text, demonstrate E-E-A-T through real experience and credentials, use a WordPress SEO plugin to guide your workflow, address your Core Web Vitals, and format content to show up in AI Overviews.
The most important thing to remember is that you do not need to fix everything at once. Pick your single most important page, whether that is your best-performing post or your main service page, and apply just one checklist item there first. That focused approach beats overwhelming yourself with a hundred tasks that never get finished.
On-page SEO is a long-term habit, not a one-time project. Small, consistent improvements compound over time. Climbing even one or two positions in search results meaningfully increases your clicks, and those gains build on each other month after month.
Your best first practical step is to visit brianhillier.co.uk and use the free SEO tools available there to audit your pages right now. You will also find detailed guides on getting the most from Yoast and Squirrly, plus tutorials on content monetisation through AdSense and affiliate marketing. Everything you need to keep improving is already waiting for you there.
Conclusion
On page SEO does not have to be overwhelming. By focusing on the fundamentals, including strategic keyword placement, compelling title tags and meta descriptions, proper heading structure, and high-quality content, you now have everything you need to start ranking higher in search results.
The biggest takeaway? Small, consistent improvements add up to massive results over time. You do not need to overhaul your entire website overnight. Pick one post, apply what you have learned here, and watch what happens.
Your content deserves to be found. Every blog post you publish is an opportunity to connect with someone who is actively searching for exactly what you have to offer. Do not let poor optimization stand in the way of that connection.
Start with one page today. Optimize it, publish it, and keep going. Your future readers are already searching. Make sure they can find you.